For quite some time now I have been working on how to get a 3d-mesh from a set of photos working so that I can have real-time terrain mapping on the UAV using the 2 on board cameras.
After search the web and finding a lot of pre-compiled binaries that would work on the ARM CPUS that are in the UAV I finally found some source code. The unfortunate thing is that it all has some very vague instructions on how to get it up and running...
The software I found was the following:
- meshlab (installed via package on Fedora)
- Viewer for point cloud data and exporter for other tools like blender
So after many tests the process was as follows:
- take a set of photos with my Samsung Galaxy S3 phone
- Run RunBundler.py (from osm-bundler) with the --photos option pointing to the directory containing a copy of photos from phone
- The first time you also need to run RunBundler with the
--checkCameraDatabase to create an entry in the camera database for the
focal length. I skipped this as I thought it was not needed. In the end I
set it 12 (12mm) as that should be about right for this phone camera.
- The above creates a directory in /tmp, cd into that directory
- run Bundle2PMVS list.txt bundle/bundle.out
This will create some files in a subdirectory named 'pmvs'
- Edit 'pmvs/prep_pmvs.sh' supplying a path for the binaries
- run the above file
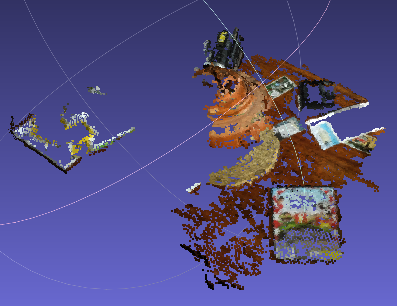
- run pmvs2 pmvs/ pmvs_options.txtThis will now have created the dense point cloud in 'pmvs/models/pmvs_options.txt.ply'
This file can now be used in meshlab

